Cloud Azure DevOps Configuration (via SSO)
Follow these instructions to configure your cloud Azure DevOps using Single Sign-On (SSO):-
Access the Cloud Option
- Visit app.codeant.ai and click on sign in with azure devops.
-
Sign In with Azure devops
- Enter your company email (note: public emails like gmail.com or yahoo.com won’t work).
- Retrieve the verification code sent to your email and enter it to complete authentication.
- If the code is not received check (junk or quarantine)
-
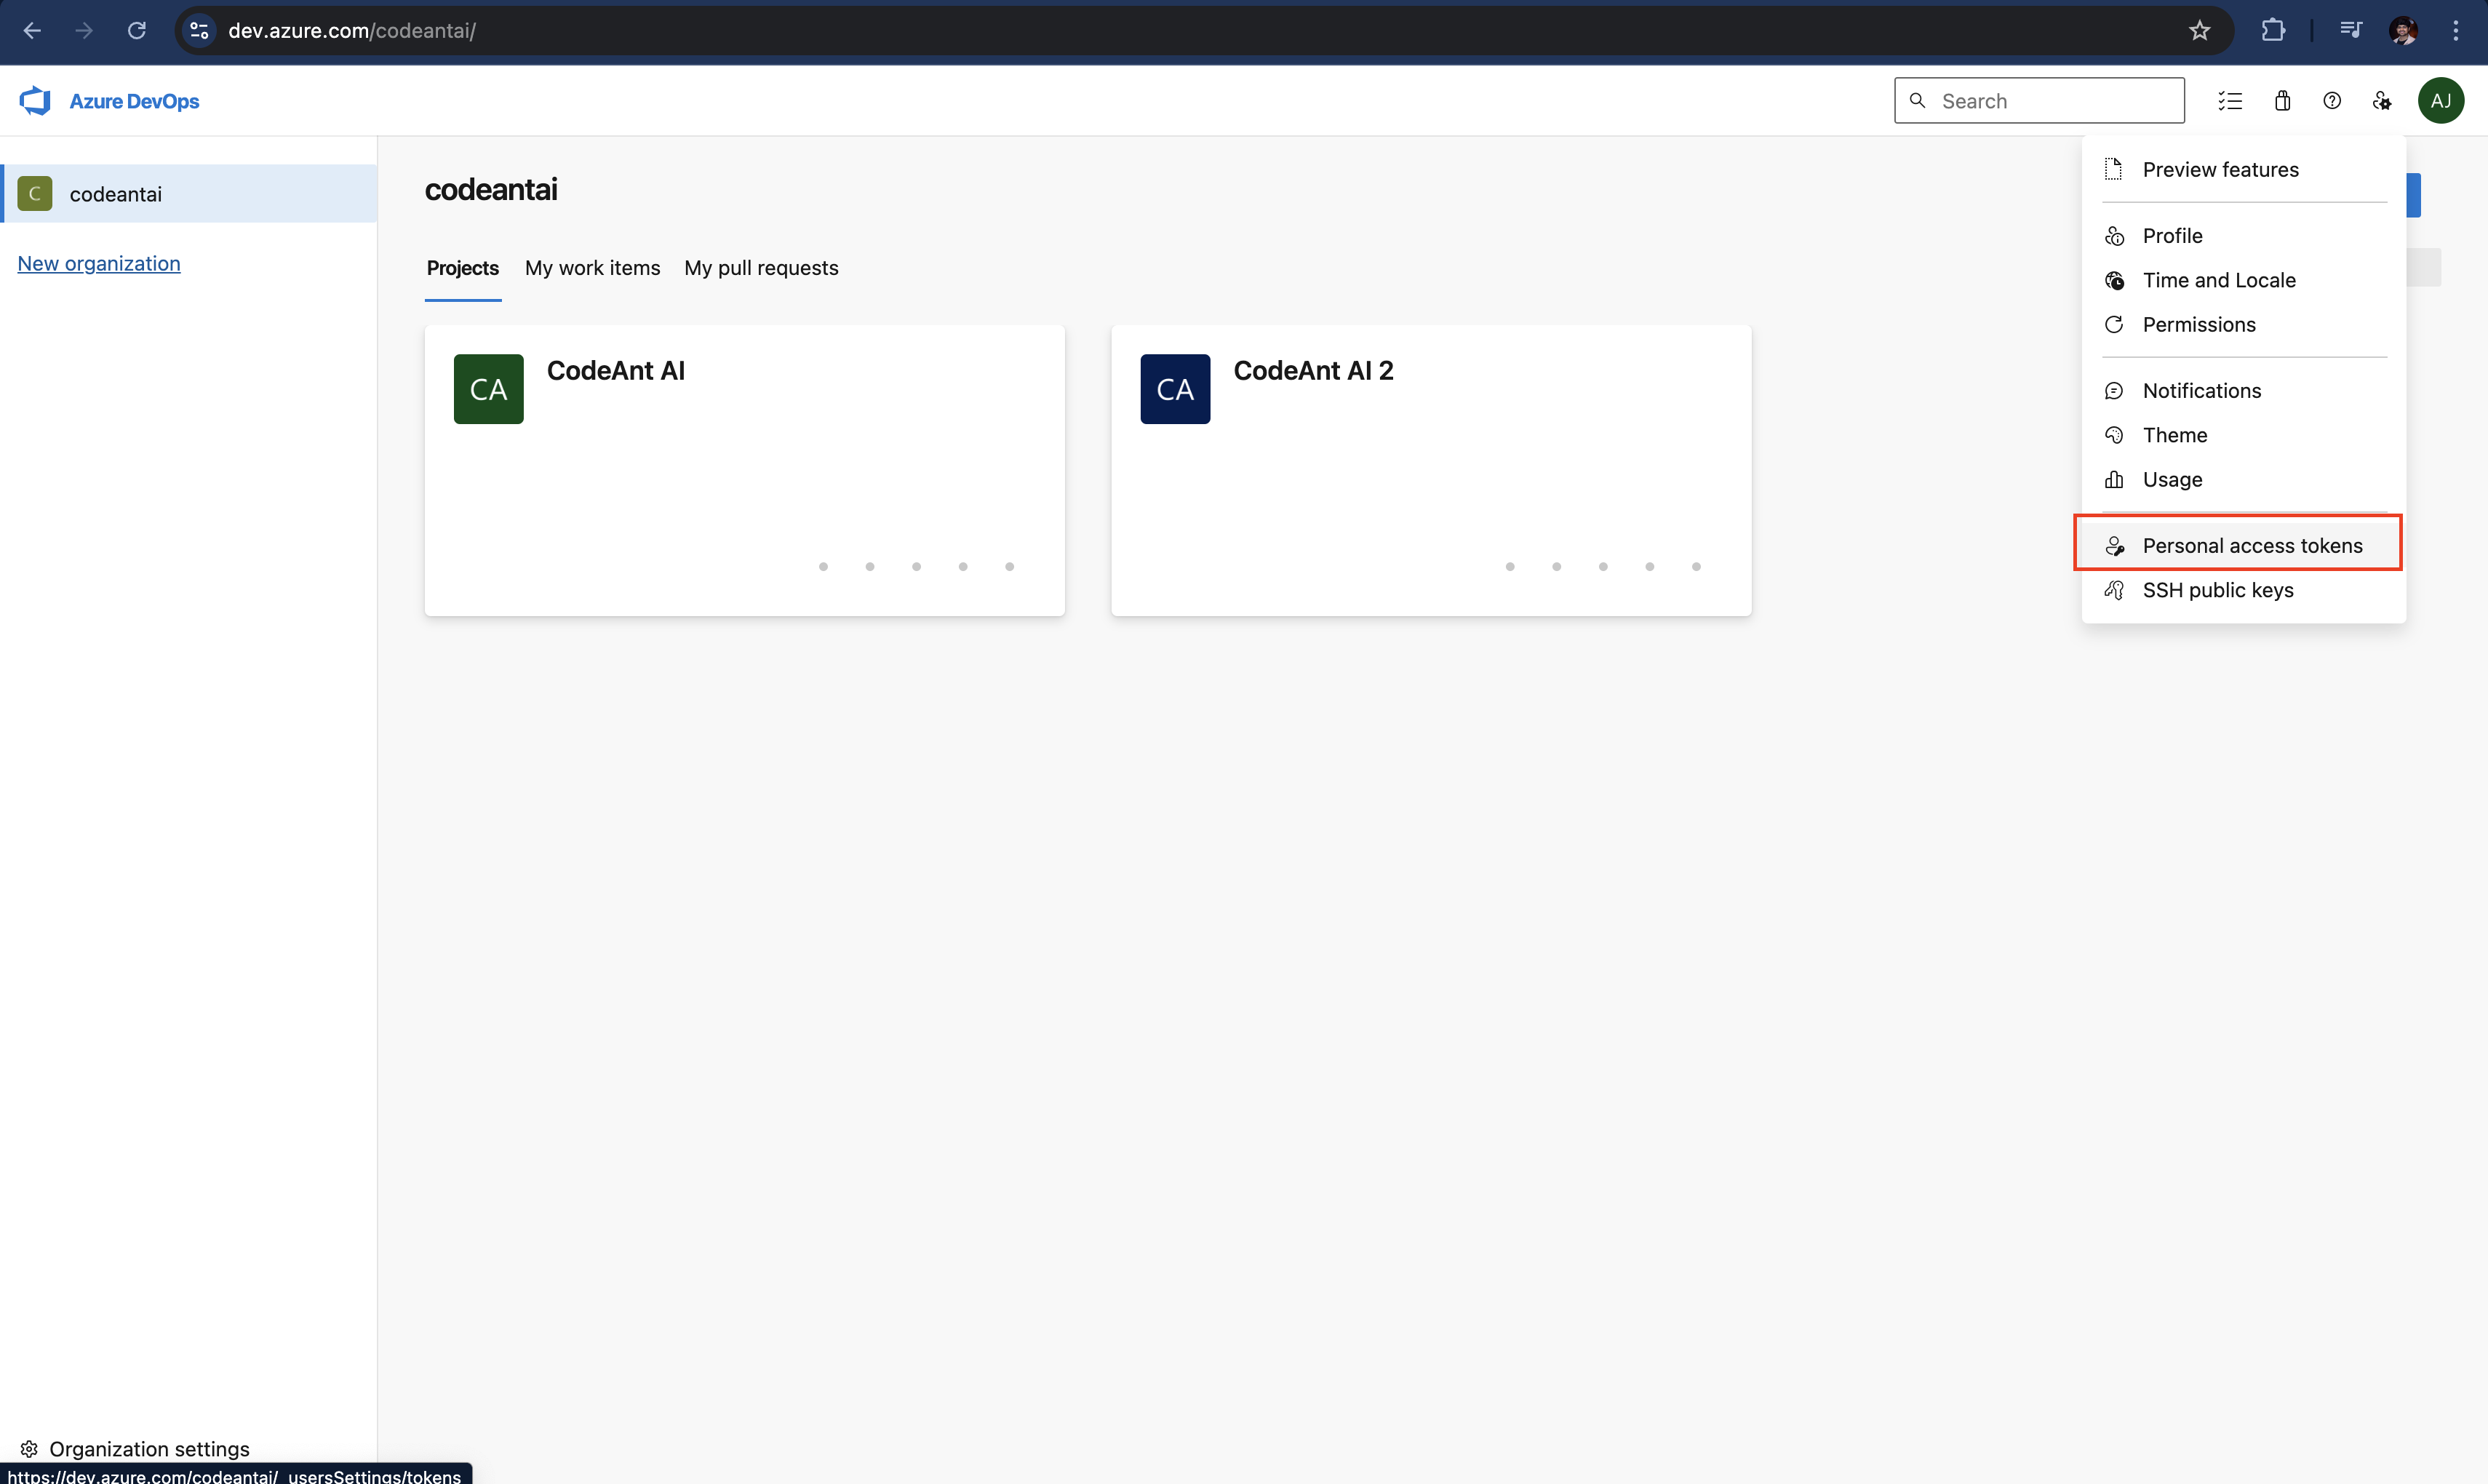
Create an Access Token
- Navigate to the Access Token menu in your azure devops:
-
- Click on + New Token.
- Configure the token:
- Name: CodeAnt AI
- Expiry Date: Choose the maximum duration available (ideally one year).
- Scopes:
- Code (Read & Write) - For Code Analysis
- Pull Request Threads (Read & Write) - For PR Review
- Build (Read) - For Dora Metrics
- Work Items (Read) - For Dora Metrics
- Copy the generated token for later use.
- Navigate to the Access Token menu in your azure devops:
-
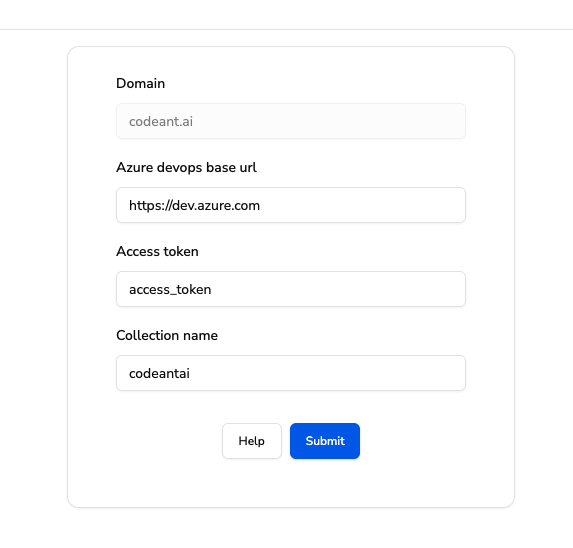
Provide Your Cloud Azure DevOps Details
- Enter the base URL of your cloud Azure DevOps instance. This should be the base URL without your organization or
defaultCollection.- Example:
https://dev.azure.com
- Example:
- Specify your organization or collection name as it appears in your repository URL.
- Example:
For the repository URL:- Base URL:
https://dev.azure.com - Organization Name:
codeantai
- Base URL:
- Example:
- Enter the base URL of your cloud Azure DevOps instance. This should be the base URL without your organization or
-
Provide Your Cloud Azure DevOps Details (Visual Studio Online-style URL)
-
Enter the base URL: Always use
https://dev.azure.com(even if your repo still shows a*.visualstudio.comdomain). -
Specify your organization name: This is the first path segment after the domain in your repo URL.
Example – for the repo URL
- Base URL:
https://dev.azure.com - Organization Name:
codeant
- Base URL:
-
Enter the base URL: Always use
Why? Microsoft now redirects*.visualstudio.com/{org}todev.azure.com/{org}, so you must supplydev.azure.comas the base while keeping the same organization name.
-
Enter the access token from the above step
-
Finalize the Setup
- Review all the entered information and click Submit.
- If everything is correct, your projects and repositories will be fetched and displayed.