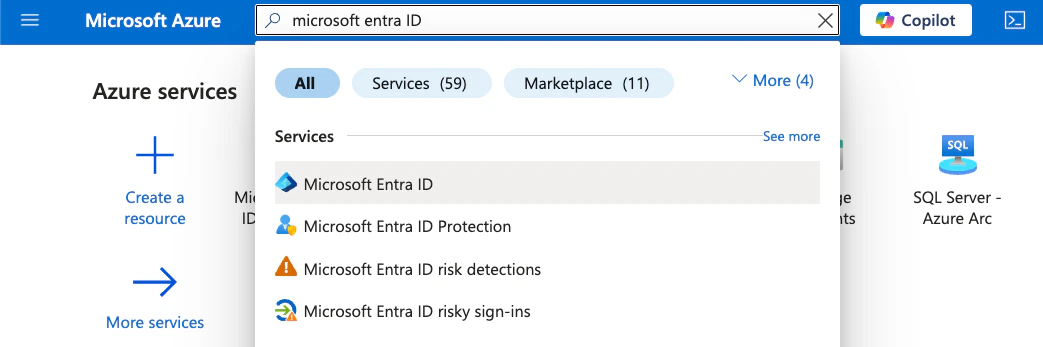
Sign in to the Azure Portal and search for Microsoft Entra ID.
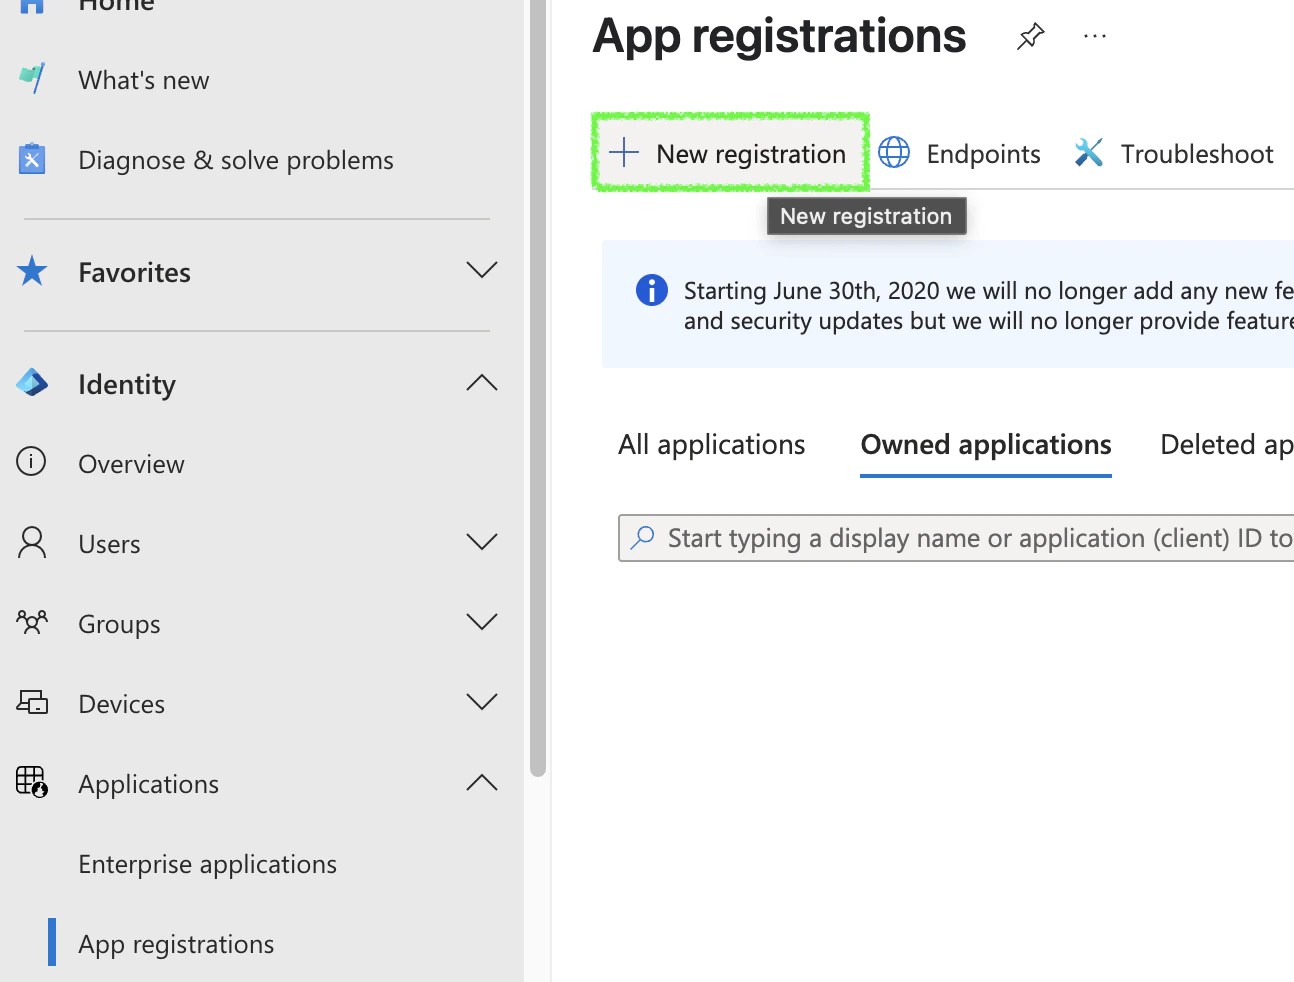
In the left menu open Manage → App registrations.
Click + New registration, give it a name (e.g. codeant-cspm), leave the defaults, and click Register.
b. Create a client secret
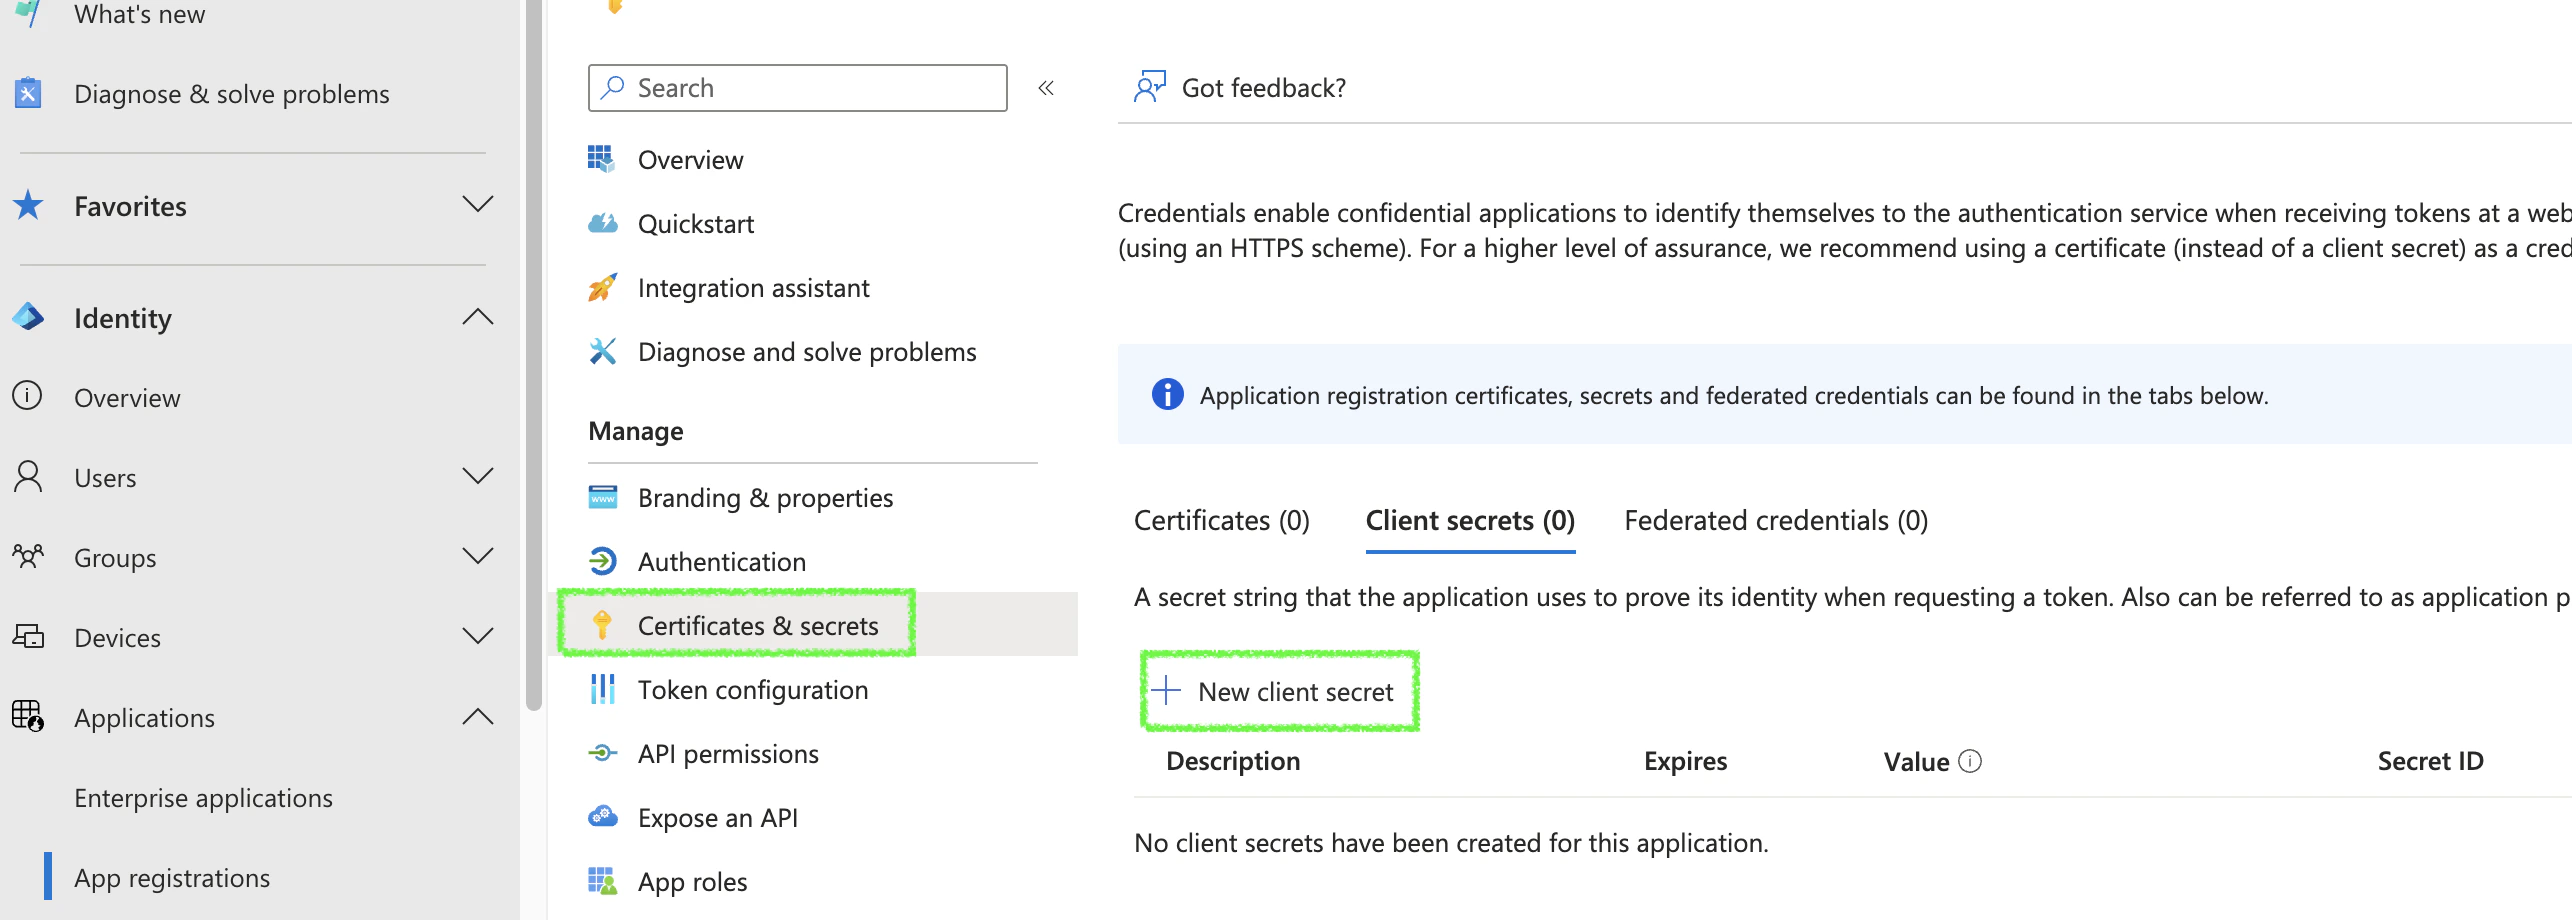
In the app registration’s left menu, open Manage → Certificates & secrets.
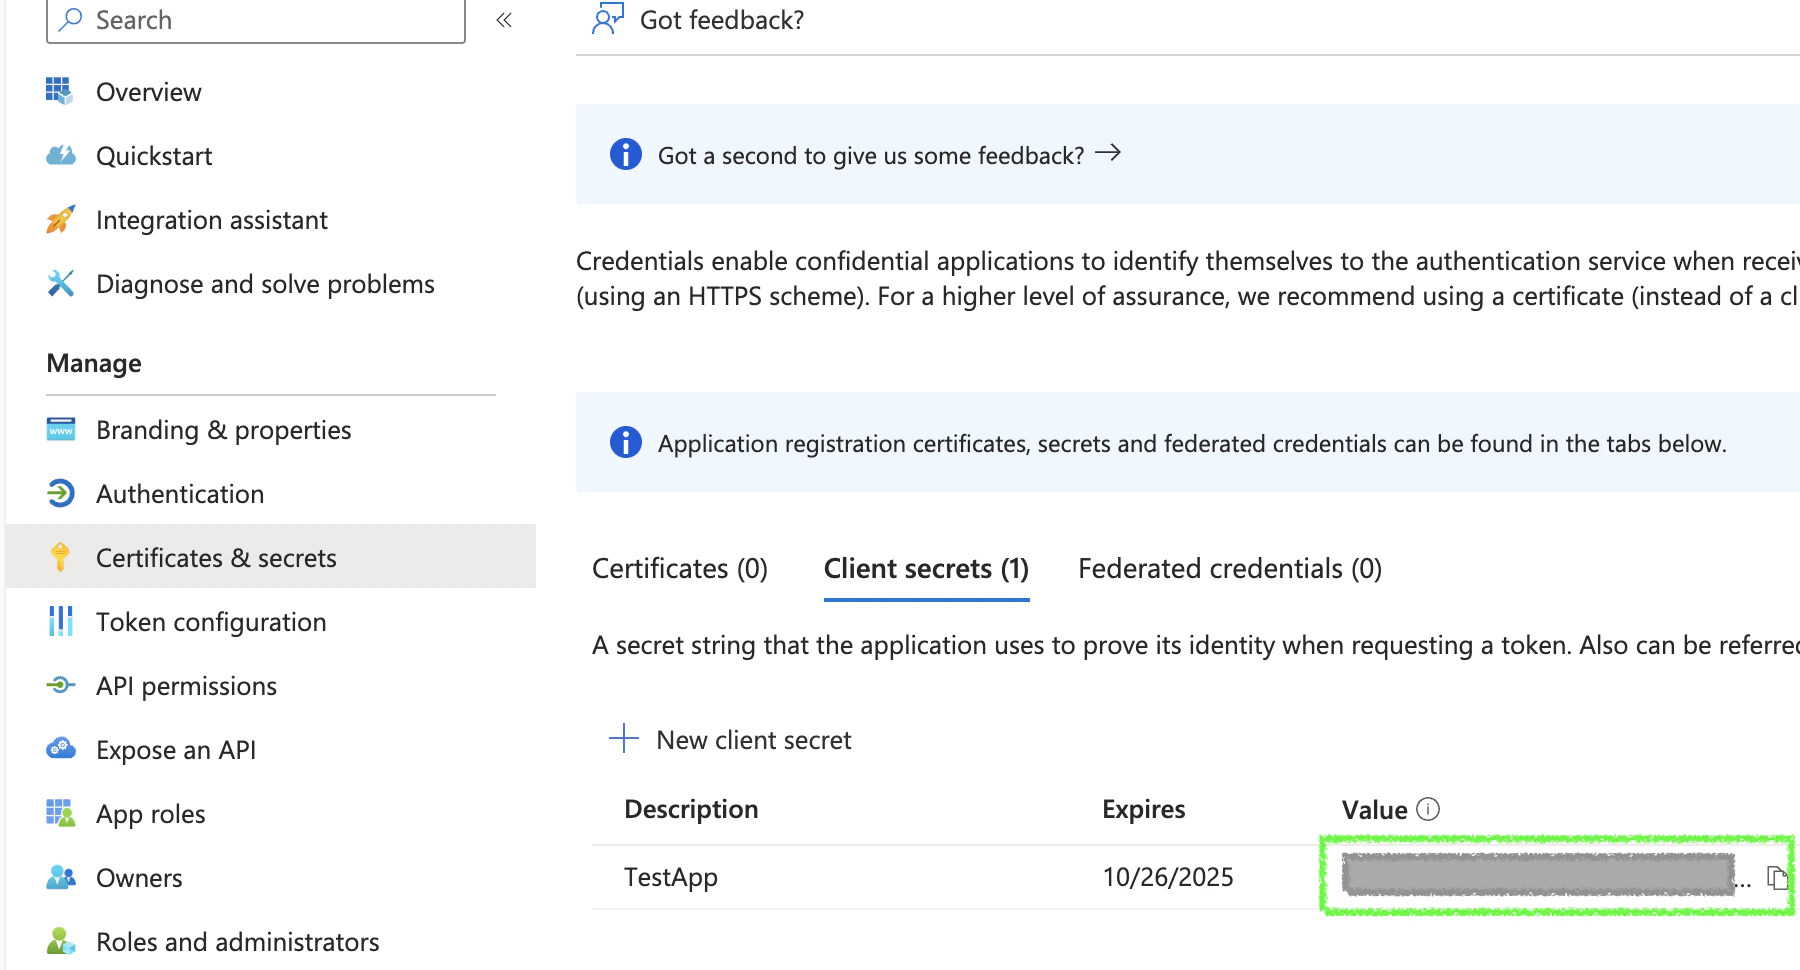
Click + New client secret, set an expiry, and click Add. Copy the secret Value immediately - it is only shown once.
c. Grant Microsoft Graph permissions
In the app registration’s left menu, open Manage → API permissions.
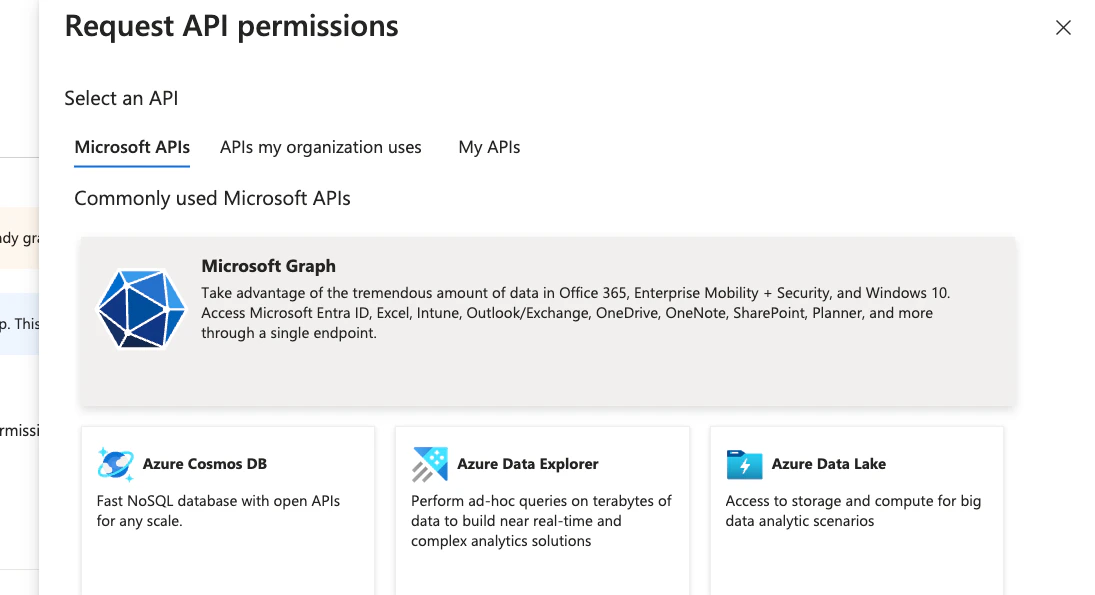
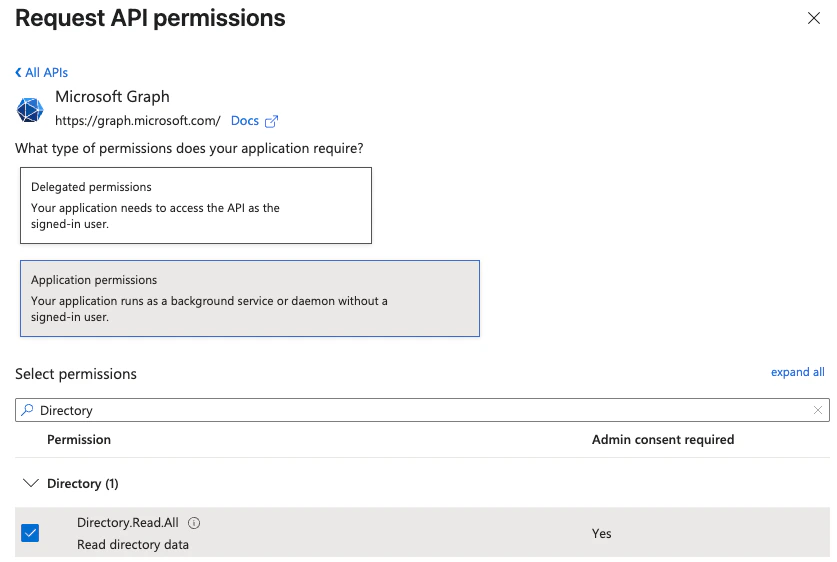
Click + Add a permission, choose Microsoft Graph, then Application permissions.
Search for and tick: AuditLog.Read.All, Directory.Read.All, Policy.Read.All. Click Add permissions.
Click Grant admin consent for <tenant>, then Yes. Each permission’s status should turn green.
d. Assign the Reader role on the subscription
In the Azure Portal top search bar, type Subscriptions and click the first plain Subscriptions result under Services (not Billing subscriptions or the Resource Manager variant).
From the list, click the subscription you want CodeAnt to scan. (If you have many subscriptions, repeat this step for each one.)
In the left menu of the subscription blade, click Access control (IAM).
Click + Add at the top of the page, then choose Add role assignment from the dropdown.
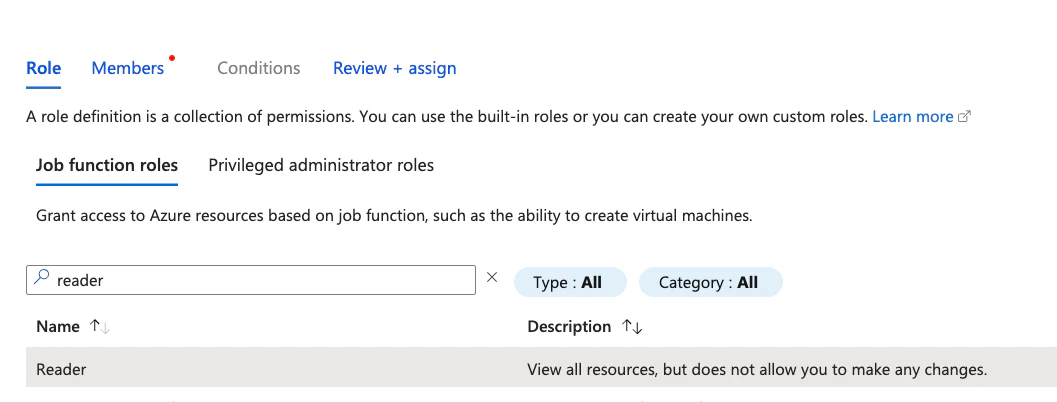
On the Role tab, search for Reader, select the Reader row, and click Next.
On the Members tab, leave Assign access to as User, group, or service principal, then click + Select members.
In the Select members panel on the right, type codeant-cspm (or the exact name you used in step a.3) into the search box, click the matching application in the results, and click Select at the bottom.
Click Next until you reach the Review + assign tab, then click Review + assign to commit.
e. Collect the credentialsFrom the app registration Overview page copy the Application (client) ID and Directory (tenant) ID. Use these together with the client secret from step b in the next section. (The Subscription ID, found on the subscription’s Overview page, isn’t part of the saved credential - it’s only used for the optional validation probe in step 2.)
Get the tenant ID
az account show --query tenantId -o tsv
Get the client (app) ID
az ad app list --display-name "codeant-cspm" --query "[0].appId" -o tsv
The three GUIDs are the well-known role IDs for AuditLog.Read.All, Directory.Read.All, and Policy.Read.All on Microsoft Graph. Admin consent requires a Global Administrator (or Privileged Role Administrator) signed in.
Settings
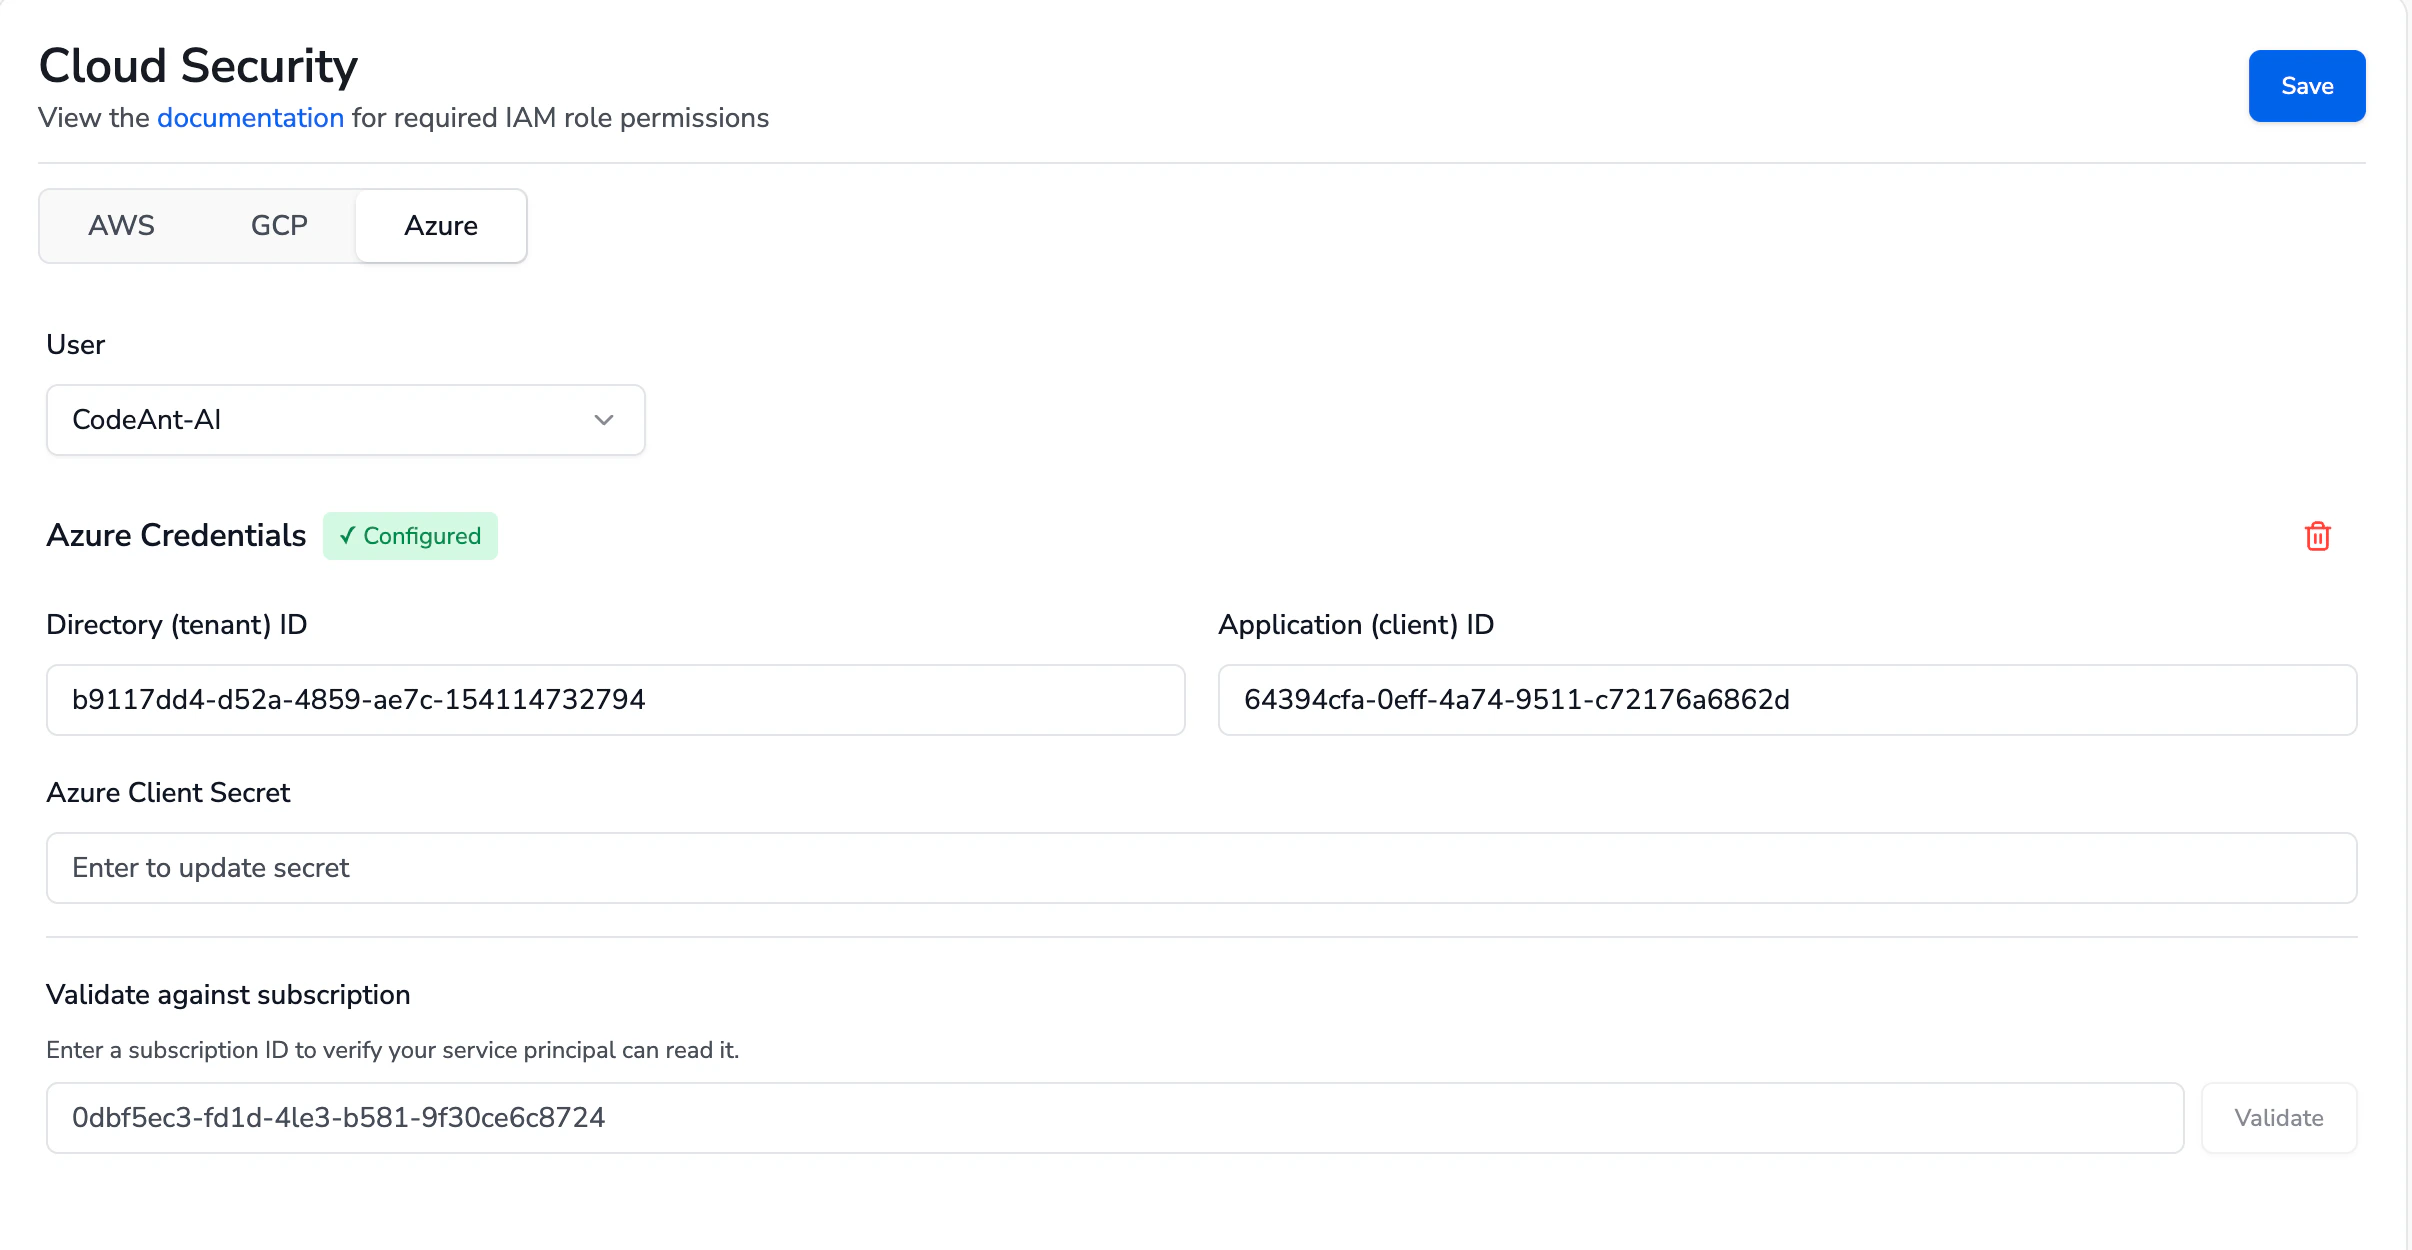
In the CodeAnt UI navigate to Settings → Cloud Security → Azure.
Under Azure Credentials, fill in Directory (tenant) ID, Application (client) ID, and Azure Client Secret, then click Save in the top right.
(Optional) Under Validate against subscription, paste a Subscription ID and click Validate to confirm the service principal can read that subscription. A green confirmation means the Reader role is assigned and resources are listable; it does not test the Graph permissions, so make sure admin consent in step 1c really turned green. The Subscription ID is not stored - it is only used for this probe.
Start a Scan
Go to Cloud Security -> Start a New Scan and pick your Azure connection.
Within 15-20 minutes, the scan will be completed, and you will see the results.
The built-in Reader role misses two read actions that a pair of App Service checks (app_function_access_keys_configured, app_function_ftps_deployment_disabled) need. To include them, create a small custom role and assign it alongside Reader:
On the subscription’s Access control (IAM) page choose + Add → Add custom role, pick Start from JSON, and upload this file with your subscription ID filled in:
{ "properties": { "roleName": "CodeAntExtraRead", "description": "Read-only actions not covered by Reader, used by two App Service checks.", "assignableScopes": ["/subscriptions/<your-subscription-id>"], "permissions": [ { "actions": [ "Microsoft.Web/sites/host/listkeys/action", "Microsoft.Web/sites/config/list/Action" ], "notActions": [], "dataActions": [], "notDataActions": [] } ] }}
Assign the new role to codeant-cspm the same way as Reader.
VM Scanning reuses this same service principal but needs the Microsoft.Compute/snapshots/* actions, which Reader does not grant - it creates a temporary disk snapshot, reads it, and deletes it. Assign the built-in Disk Snapshot Contributor role to the CSPM app alongside Reader (Reader is still needed to read the source disk):
Azure Portal
Azure CLI
Open the subscription → Access control (IAM) → + Add → Add role assignment.
On the Role tab, search for Disk Snapshot Contributor, select it, and click Next.
On the Members tab, click + Select members, choose your CSPM app (e.g. codeant-cspm), and click Select.
Click Review + assign. Repeat for each subscription you want VM Scanning to cover.
az role assignment create \
  --assignee YOUR_APP_ID \
  --role "Disk Snapshot Contributor" \
  --scope "/subscriptions/YOUR_SUBSCRIPTION_ID"
Without this role the scan fails when creating the snapshot, returning 403 Forbidden on a PUT .../providers/Microsoft.Compute/snapshots/... request.
Assistant
Responses are generated using AI and may contain mistakes.